

I got this desk from a local online yard sale place and paid $10 for it. I didn't realize at the time how much work it would need. First of all the guy who owned it growing up decided that it needed a little handy work, so he carved it up with the initials of the girls that he liked.
 Then he progressed to carving out the whole thing.
 Then he started writing it in permanent marker!
 Seriously??? I thought only girls did that kind of thing!
  Then to top it all off, he added a bunch a stickers to liven it up!
 Oh yeah, that's much better...uh, NOT!
Obviously this desk needed some TLC.
First, I tried using a paint and finish stripper, which was a big mistake! It didn't work since the finish was so old. I ended up just sanding and scraping it off. I definitely had to use my safety glasses when sanding, since the old finish was literally flying off in chunks! I also had to use a lot of wood putty! This poor thing was VERY beat up!
 After sanding it as best as I could (and still not being able get all the previous finish off) I had to use KILZ Primer to cover the existing finish so I could paint over it.
 I would have preferred not having to use it, since I was painting the desk black, but oh well! After the using the KILZ primer in my problem spots and re-sanding it, I covered it again with a darker primer and then started spraying it black.
 Things were going pretty good, but I ran out of black paint. I had to paint the insides of the drawers to cover up a bunch of graffiti and ran out before being able to paint the top. I HATE running out of stuff when I am in the middle of a project!!! Hate it!
Luckily I had a can of regular black satin paint from another project, so I used that. I actually preferred rolling on the paint. It made it look a lot more smooth and I was able to do 2-3 coats and still have plenty left over!
 Sadly the damage to the drawers were so bad that it didn't matter how much sanding, putty and paint I put on this thing you could still see it's unfortunate past coming out.
 As you can see I had to fill in the holes of the older hardware (it wasn't a normal size, and I would have kept the old ones and given them a face lift but some of them were broken) and the wood grain was showing through a lot. I'm not sure if it was a cheaper wood that was used, or if it was just really old, or if it was from being stored out in the cold in the previous owners storage unit, but it was really bad.
So...I decided to give it a face lift using Mod Podge!

 These were a few of the drawers as they were drying. I looked all over for the paper I wanted and finally found a black and white design I liked. They came in the 12x12 scrapbook size, so it was a little tricky to get it all to fit using only 3 sheets. If you look REALLY close in person you can see my puzzle saviness to get it to all work! :-) It was not easy!
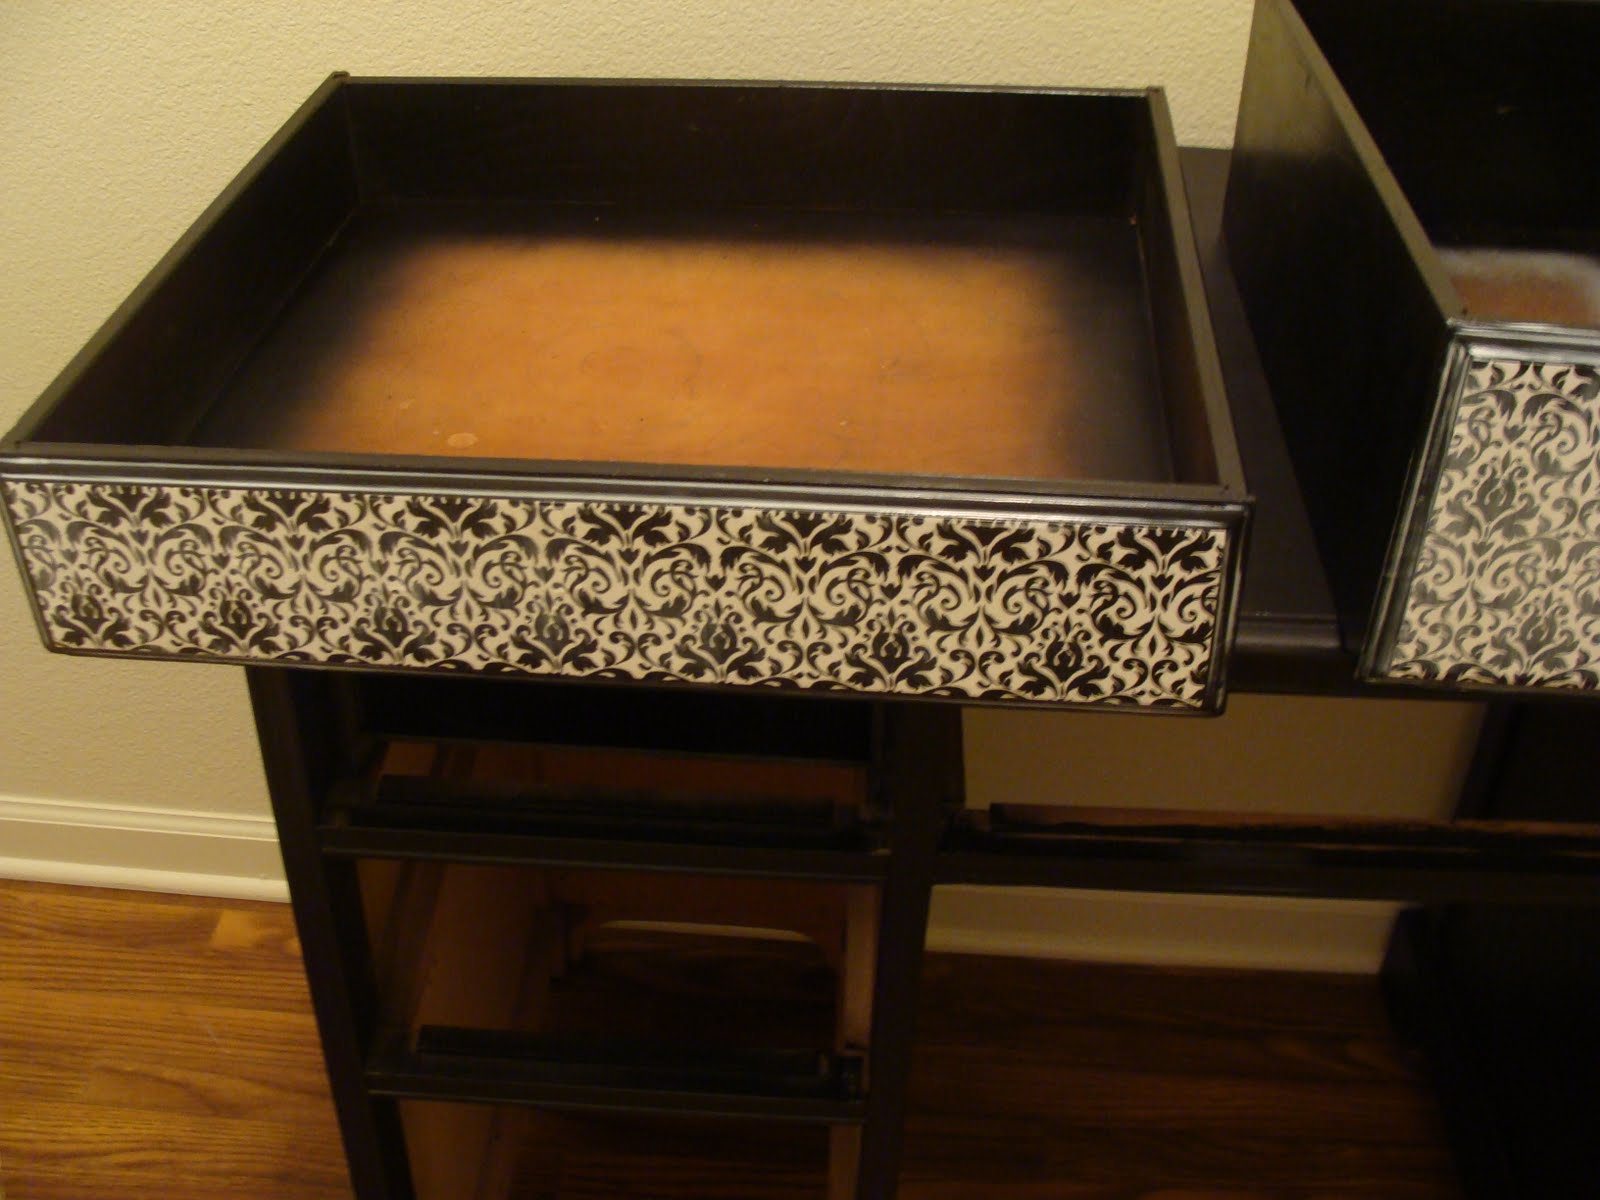 I had to buy a whole tablet of paper to get what I wanted, so I used some of the other colored papers to line the insides of the drawers!
 After all that, it sat for quite a while in our entrance way until one day I decided I needed to clean out a spot in my craft room so I could move it in. After I cleaned out a spot I realized that I hadn't done the most important thing. I had forgotten to polyurethane it! No matter how much I sanded, or painted the top it was still very rough, so for the first time EVER I polyurethaned (not a word, I know) something. It was frustrating at first, but it all worked out and it looks and feels beautiful!
So without further ado...here she is all "finished"!
 I type "finished" because I was unable to find baskets to replace the missing drawer front on the left and right, to try and keep it somewhat symmetrical. Maybe someday I will be able to make a drawer front to replace the missing one and Mod Podge those to make it all the same, but until then this was the best I could come up with. Any suggestions???
To give you more before and afters:
Desk Before
Desk After:
And since I also mentioned that this is my new sewing desk, you can see what it has done to my small craft room. (Seriously. Small. It's a closet!) So here is the craft room before:
 And here is the Craft Room After:
I LUUUUUVE It!
One more before and after of the desk, this time side by side:

Ahhhhhhhh, so much better!
Linking up to Primitive and Proper Link party:
One more before and after of the desk, this time side by side:

Ahhhhhhhh, so much better!
Linking up to Primitive and Proper Link party:


12 comments:
You did a great job it looks fantastic.
You put a tremendous amount of work into this, and it paid off. It's beautiful-enjoy it!
This is absolutely gorgeous - I love the transformation!
WOW!!! That looks SO GOOD!
That desk is gorgeous! You did an excellent job!!
Now I want a new desk!! lol
I really like the transformation. You are so creative, and it's wonderful now. Maybe a cute basket in the empty door front. You've inspired me to search out garage sales or good will for my own go at. :) Thanks for sharing.
Very, very cute!! great job.!
Thanks for stopping by my blog!! You are one talented lady!! This desk turned out AMAZING!! I LOVE your christmas ornaments and card holder also. I will FOR SURE be making some for next year!!
Wow, what alot of hard work! I adore your finished product! The mod podge was a smashing idea!!!
I love the paper you added! It's the perfect touch!
I don't think this desk could be more fantastic! I have just the perfect spot in my home for it! Great job! I will be following!
Fabulous! I am a sucker for black and white. I like your idea of 'decorating' the desk far more than the original owner's!
Post a Comment